
REDCap tutorials
This book contains tutorials related to complex functionalities from REDCap as well as a list of new functionalities that are introduced at each major update.
Of note, if in REDCap you are not seeing one of the functionalities presented in the book, it means that you do not have the access rights. To access the desired functionality, go to  , select your username and click on
  to adjust the individual access privileges. If you are not even seeing the option, then you need to ask the project responsible or the Sponsor/PI to grant you access to the desired functionality.
Recording of the last REDCap Database Implementation Course [10.04.2024]
The course material can be downloaded here.
Multi-Language Management
The Multi-Language Management (MLM) feature enables you to setup translations for your fields as well as for the whole REDCap interface (e.g., buttons, links, instructions, ..).
Keep in mind, that you should ideally start defining new languages and translations only when your instruments' fields are all set and finalized.
IMPORTANT: Changes are not automatically saved, thus you regularly need to save your changes either by pressing on CTRL+S or on  .
.
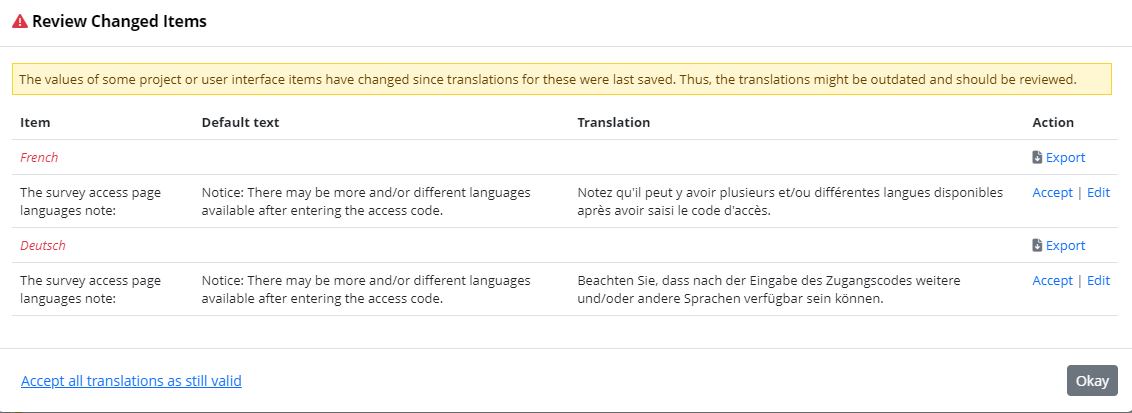
You are also informed of any updates to your original translated items:

And you are able to review the changes before approving them:
1. Add a New Language
To add a new language go to  ➡️
➡️  .
.
From there you have the possibility to either define the language manually or to use one of the system languages provided by the DIT-SIT team.
Of note, the first language should be the default one (i.e., the language in which your fields were originally written).
NEW INTERFACE (since REDCap 13.7.4)
When you want to add a new language, you first have to chose whether you want to use one of our validated system languages or if you prefer to build you translation from scratch: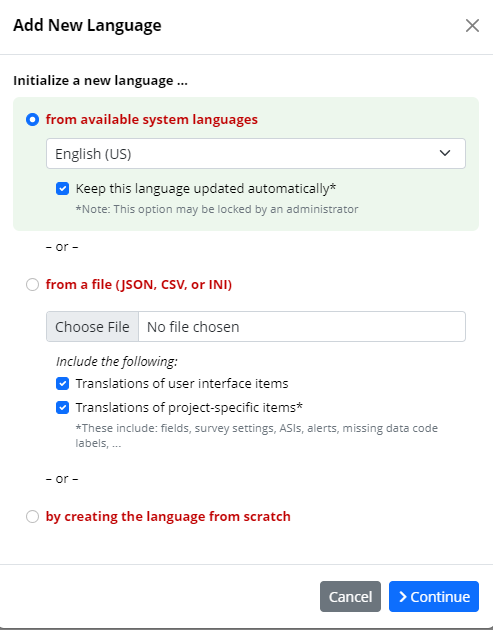
If you select the option "from available system languages" you now also have the possibility to keep the language updated automatically (i.e., the updates are done by REDCap admins).
1.1. System Languages
The DIT-SIT provides a number of system languages most of which were validated from the Johns Hopkins University.
You can find the list of available system languages as well as translation certification documents on the following REDCap webpage.
Keep in mind that these translations only apply to the User Interface but will not automatically translate your fields.
Click on  and then simply select the language from the drop-down list of "available system languages":
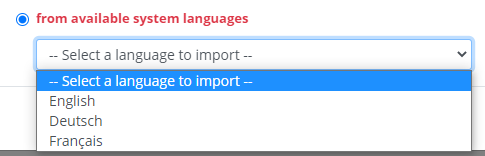
If the language you are interested in is not available in this list, email the DIT-SIT team and they will add the missing language(s) system translation.
1.2. Manually Setting Up a Language
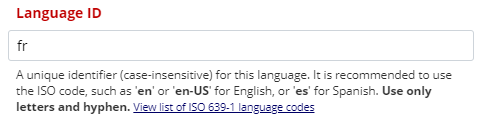
- First, you need to enter the 2-letters ISO code (see list) related to the language you want to define:
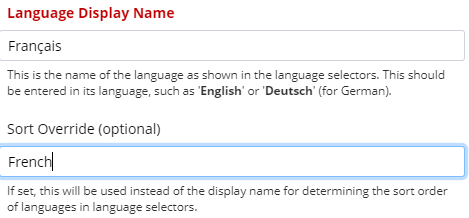
- Then, you should set the "Display Name" (in its language) and optionally define an "Alternate Name" (e.g., in English) to enhance classification :
When you are ready, simply press on to validate your settings.
2. General Settings
Once you have defined each language separately, they will appear under the  tab:
tab:

If you want to use one of the listed languages, do not forget to activate your languages  .
.
Again, you should always set the language in which you entered your fields (here French) as the "Default" and "Fallback" option (!).
2.1. Import/Export Language Translations
You also have the possibility to export your language translations in different formats by pressing on  if you prefer to work in external applications (e.g., Excel):

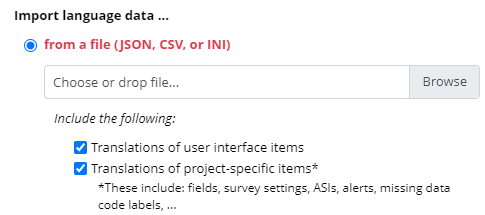
Similarly, you can import your translations by editing a specific language: ➡️
➡️ 
and load your file here:
3. Forms/Survey
Under the  tab, first, select the language for which you'd like to manually enter translations (logically NOT the default/reference language):
  .
.
Then, for each instrument you have created you can define if you want to apply translations to the Data Entry and/or Survey functionality: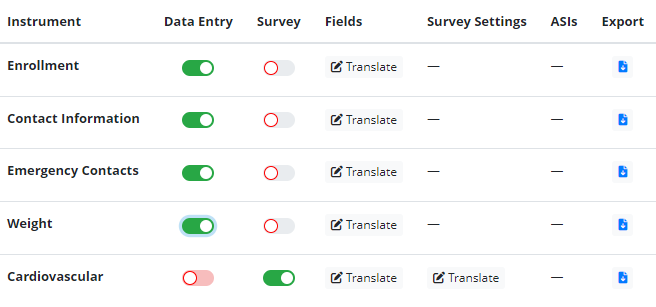
Once you are safistied with your settings, simply press on  to start providing translations to your fields.
Keep in mind here that you also have the possiblity to export individual instrument translations (similarly to what was described above for the whole language export/import).
4. Translate Items
The principle behing translating items remains the same if it's for fields, Alerts, or for the User Interface:
You need to manually enter the translation in the dedicated entry form for each item:
Once done, the field turns green:
Repeat this step for all listed items and do not forget to save (CTLR + S or by pressing on )
)
If you have a very long list of items which are partially translated, you can always decide to hide the translated items by clicking on  .
.
If you chose to add a new language from the available system languages (see 1.2), you will notice that most (if not all) items under the  tab are already translated, e.g.:
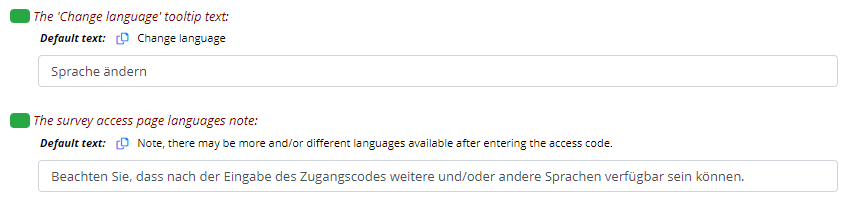
5. Advanced Settings
Under the  tab, you will find additional options that may, for e.g., help you identify missing translations.
There, you can also create snapshots of your translations by pressing on  .
.
As specified, creating a snapshot can be useful to allow you to revert your translations back to a specific point in time.
6. Language Preference Field
If you use Surveys, you have the possibility to create a field dedicated to setting language preferences for each record.
You have the possibility either to create the field for the Data Entry interface or for it to be displayed in the Survey.
- Select one your instrument and create a new field
 with type
  or
or  .
. - Give it a meaningful name (e.g., "language_pref")
- Define the choices according to the languages you have created earlier, e.g.:

Of note, the choices must match the languages ID (2-letters ISO CODE) you have defined earlier in the  module.
- Add the following
 to apply the language preference to your instruments:
- Save the field, go back to
 and select the field you have just created from the drop-down list:
- Other can be used if, for e.g., if you want to retrieve the current language of a specific survey page and paste it somewhere else:
 .
.
Additional Documentation
Here are 4 videos that may support you in exploring the MLM module:
- Adding Languages
- Providing Translations of Surveys/Instruments
- Translating the User Interface
- Exporting and Importing Languages Between Projects